A "God is Faithful" Sign

I have always wanted a tattoo.

I know it's silly. My husband is NOT a fan of the idea and I can't explain it...
but I have always wanted a tattoo.

Now it's a huge decision so I told myself if I wanted the same design for a long time (years) than I must really want it. I also wanted it to have a purpose... I wanted it to be a reminder of a truth that I should never forget.

Well, Bryan eventually caved and he's let me get a design and even took me to a tattoo parlor on one of our NOLA trips... I of course... chickened out. Hello... NEEDLES!!!

But the design...

I am blessed to have crazy ridiculously talented friends. Rachel is one of those people. She is an architect who has such raw and beautiful artistic talent... I am constantly blown away by her. You describe something to her and she can draw it. Insane.

Me and Rachel with a photobombing Elliot


So, I called her up and told her my need and she immediately got to work.
She designed this bad boy in just a few hours...


Now This is only a temporary tattoo of it... (Again... Chicken)

But it's stunning isn't it?

So stunning I have to put it in my house somehow... because it is a Truth I don't want to forget.

ATruth God so lovingly has taught me over the years.

How?

Well, In September 2009 we found out a startling and awesome surprise.
We were pregnant.

God is faithful in seasons of great joy.

On October 30, 2009 at ten weeks pregnant I started having severe stomach cramps and spotting. We rushed to the hospital for an ultrasound and discovered our little bean had stopped growing at 6 weeks.  I had been inconsolable by nurses and doctors.

God is faithful when joy turns to mourning.

The next week was filled with doctor appointments and denial. On November 4th, 2009 on our second wedding anniversary, I was subjected to test after test and another ultrasound to prove that our “pumpkin” had stopped growing. When those tests came back confirming that fact, Bryan ordered them done again.

Proverbs 16:9
In his heart a man plans his course, but the Lord determines his steps.

I soon found myself in the hospital parking lot, yelling into my cell phone wanting to know why Bryan was putting me through more tests, telling him I was sorry that I had lost the baby but that it was over, to please make them stop the tests. Bryan immediately left work to be with me and we cried the rest of the day together until he called the doctor and scheduled my D&C for the next day. He hadn’t wanted to let go and had been praying for a miracle. Letting me go through with the procedure made him feel as if his faith was not good enough.

Isaiah 55:7-9
"For my thoughts are not your thoughts, neither are your ways my ways," declares the LORD. "As the heavens are higher than the earth, so are my ways higher than your ways and my thoughts than your thoughts

I had always thought growing up that Faith was something we could measure. All you needed was the faith of a mustard seed to move a mountain... but how many mustard seeds did people possess? 
But I think Jesus was using the example of a mustard seed because they are so tiny... He knew our capability for doubt, to question... He knew about our frailness, how much we would fail and yet He still went to the Cross. 

While we mourned and searched for answers we learned that God was not disappointed in us, in our search or in our weakness. He didn't take our baby away to teach us some lesson or to prove to us that we "needed more faith".

God doesn't work like that.

What we did learn about God was that he would never leave us or forsake us.

When my world is shaking
Heaven stands
When my heart is breaking
I never leave Your hands

Our world was shaking and we were lost and confused yet God provided overwhelming love and peace to us in the form of loving family and friends and opening our minds to understand Him better and how much He truly loves us. He would carry us through anything. He carried us as our dream of a family came true and than suddenly fizzled. Suddenly realizing that the Lord is walking with you hand in hand in life takes away a lot of the fear of what could happen. No matter what, God is faithful to take care of His children. To love His children and to comfort them.

Lamentations 3:22-23
The steadfast love of the LORD never ceases; His mercies never come to an end; they are new every morning; great is your faithfulness.

In March 2010, a new little bean showed up in our lives. Our doctor took every precaution with this pregnancy and even ordered us to have a Heart Ultrasound done since Bryan had been born with a congenital defect known as Tetralogy of Fellow. It wasn't hereditary but she didn't want to take the chance. 

While the new Doctor (Who looked like Col Sanders, no lie) was asking us questions and why we were having this special procedure done Bryan told him of his medical history and that he was all better now. The doctor didn't believe him... 

Who can stand against us
In my weakness, you are strong
Your love is everlasting
I will praise you, faithful one

Turns out Bryan wasn't ok.

His heart was enlarged to twice its size and two of his valves were blocked. His heart was taking on so much pressure trying to accommodate its size that eventually it would just give out... and he'd be gone. No warning. No symptoms. Dead before 35. 

And I'd be alone. With a Baby. 

God is faithful to constantly blow away our misconceptions about who He is, how He operates and how much He loves us.

Six months later Bryan had open heart surgery for the second time. He is now in perfect health with one super sexy scar down his chest. 


Psalm 139:13-16
For you created my inmost being; you knit me together in my mother's womb. I praise you because I am fearfully and wonderfully made; your works are wonderful, I know that full well. My frame was not hidden from you when I was made in the secret place. When I was woven together in the depths of the earth, Your eyes saw my unformed body.  All the days ordained for me were written in your book before one of them came to be.

God was faithful when we didn't understand a trial he had brought us through. That trial led to the protection of our family. 

Philippians 1:6
And I am sure of this, that He who began a good work in you will bring it to completion at the day of Jesus Christ.

Please be reminded dear friend that God is Faithful to always love you. To always do good for you even when life certainly does not look good.

You are His precious child.

While it isn't a tattoo (yet)...


It sure makes for a beautiful wood sign and will let all who walk in our home know...


God is Faithful.
God Bless & Much Love,

    Jessica 


DIY Crazy Easy Chevron Growth Chart Ruler

I'm a big fan of making crafts that make you want to do a "Happy Dance" in the middle of making them.

You Happy Dance because it was so easy, so fun and looks SO GOOD that you sometimes forget you didn't buy it but you made it. 

My friend and I made one such gem today.

After one conversation with Sarah we were head over heels with each other.
We had found our crafting buddy!

She has been trying for a few weeks now to come over and have a "Craft Day".
Finally we found a date and the craft requests and supplies started texting in...


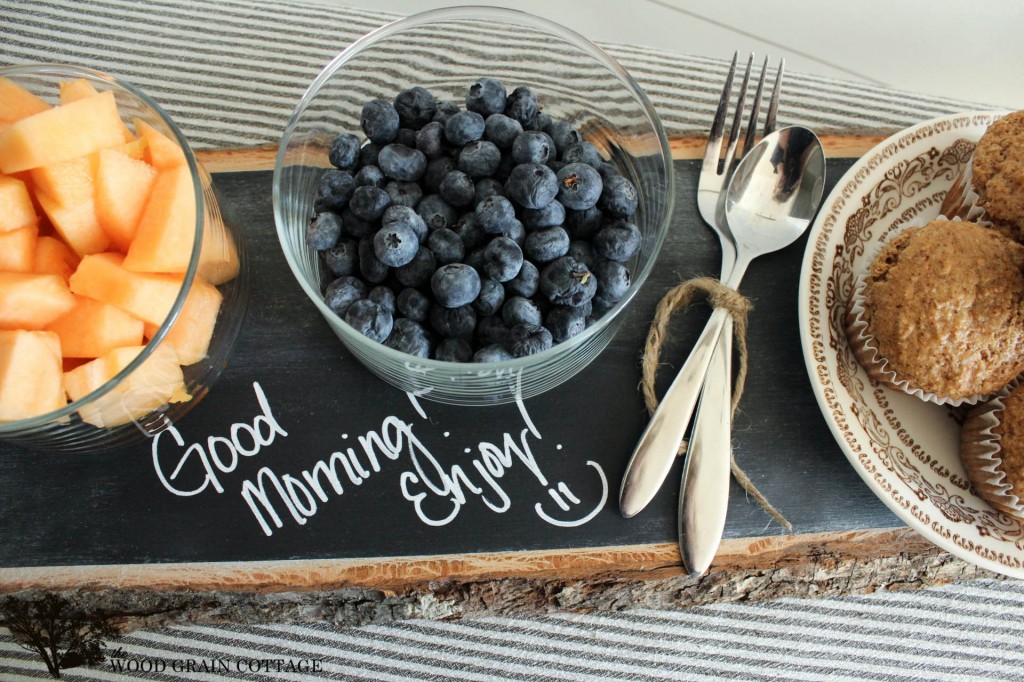
She wanted to do this Rustic Chalkboard Serving Tray from The Wood Grain Cottage:

  DIY Rustic Chalkboard Serving Tray by The Wood Grain Cottage

Their tutorial is amazing and that is what we followed so if you love this... go over there and make one of these SUPER EASY babies yourself!
Here are ours!


Awesome twenty minute project.

Besides that beauty Sarah wanted to make a Growth Chart Ruler

Those are two incredibly easy crafts that we could totally pull off in one morning with 
three toddlers running around. 

I've made a Growth Chart Ruler before to chronicle
my little Monsters growth-


I assumed this Growth Chart Rulerwould be exactly the same. It's like a three process step and you can knock one of these puppies out in as fast as you can get your wood stain to dry!

So she went shopping and brought over this amazing new stain color I hadn't seen yet!


I was so excited about it I brought some projects of mine out to stain as well. Plus she left it at my house so I could play with it for other projects!! True Friend.

She bought a regular 1”x6” foot board board for under $5 at Home Depot. Under $5 people!

When you buy a board to make a ruler chart make sure it's six feet, that it has some good knots in it and also that it is level. Look at it sideways and make sure it's not bowed. If it is when you put it on your wall it will pop up (like mine does... oie...) You want it to be flat against your wall so try and find the straightest board you can.

We brushed on the stain, wiped it off after about twenty minutes to make sure there weren't any wet spots (wet stain spots... Will Not Dry no matter how much time you give them.)
I brought it in for the night so it wouldn't warp outside and the next day we put it on the counter to put on our inch marks and numbers!


Now here is where a regular Growth Chart Ruler craft changed suddenly and completely...

I pulled up Pinterest and "Growth Chart Ruler" to show Sarah all the options she had for how to position the numbers and inch marks on the chart.

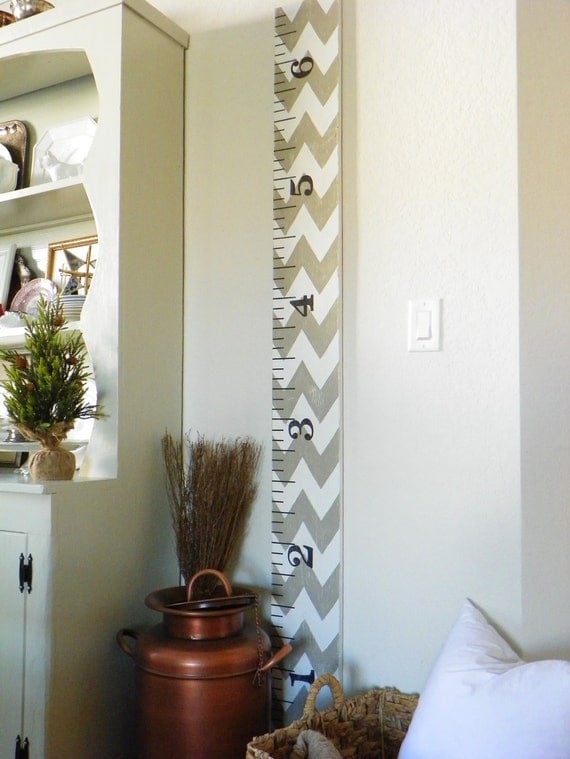
While looking... we saw this BAD BOY:

                        Growth Ruler- distressed grey and creamy white chevron

It's from an adorable Etsy shop called Winder and Maine Shoppe and that piece of awesomeness... costs $70 + $28 to ship it. I almost had a heart attack... that's $98 for a piece of wood!!!

I nearly fainted...


Thankfully Sarah and I have the same problem. We see a craft... and have to do it.
We saw this and immediately thought...


It is gorgeous.


Bet we could do it....


So we got to work!

Now Chevron is amazing... so beautiful... so horrible to pull off... Right?

Yea, if you sit there and tape it off.... It's a stinkin nightmare. 

But please don't. Save yourself!! Do it this fast and EASY WAY!! 

First: We found a Chevron pattern we liked. We wanted a big fat one so we googled big chevron and soon realized we'd have to tweak one ourselves. Here is my final project:


Feel free to steal this puppy for your use in any Chevron Project you do.
We just used the middle Chevron stripe.

I made it an 8x11 so it would print right on a regular piece of card stock. I also took out all the color in it so I wouldn't use all my ink. (I try and be thrifty like that...)

We cut out the one Chevron strip we wanted and than got some self-adhesive vinyl.

I have a Cricut so have some of that stuff lying around alot. If not it can easily be bought at Hobby Lobby and with a 40% coupon it will be worth the price.

Second: We rolled out our pink self adhesive vinyl and laid our design on it. We traced two Chevron strips on it. You NEED at least two.


Third: We placed our new Chevron Stickers on our board and started painting!


This is a great picture except that I'm not wearing my wedding rings... H
Obviously I should NOT wear my wedding rings when crafting cause who knows what I'd do to them... but I felt I needed to mention that they SHOULD be there cause my husband spent so much love and money on them... and I LOVE THEM. Thank you baby!

Ok back to the craft...

Since the board had an amazing light gray stain we wanted to keep with the rustic look so we got out some just regular house paint I had left over and a brush to dry brush on the white chevron stripes.


Dry brushing is super easy... you just dip your brush in a tiny bit of paint and than try and brush it all off on your project. It's a crazy light coat that dries within seconds. You can do any brush stroke, up and down, left to right... the more crazy the cuter it looks. 


Then we would just take the top Chevron Sticker and move it under the next one. Ours were 
3 ½ inches wide so we would measure from the middle tip 3 ½ inches down and place the sticker there.


Was it always perfect? No... but we were able to fix any small mess ups I made quickly and would just compensate on the next one moving it back over a bit.

The end result... was stunning.


That's my friend Sarah! She's super cute! 


And it took a whopping... half an hour. HALF AN HOUR PEOPLE!!!

If we would have measured we would still be measuring...

Now we were back at where we started putting on some inch marks and the numbers!

You can do this any way you like. All to the left. All to the right. Numbers on one side, inch marks on the other... or numbers sideways!

It's all what you enjoy to look at.

Sarah wanted her numbers closer to the inch marks so we took the same number outlines I had printed out for my Ruler Chart and just stuck them on the board. We dry brushed some black craft paint into the outline number holes and VIOLA!!!


It's adorable isn't it?!


Happy Craft Dance!


We did learn the 5 is a little further out than the other numbers but... we just are gonna say that's the goal we'd really like her son John to hit so we totally did that on purpose. 


 Talk about a fun craft that took maybe two hours and now she can enjoy it forever!

If you have always been wanting to do a Growth Chart Ruler (and you know you have) go ahead and do it! It takes so little time and the satisfaction you get from a job well done...

You'll be doing a  Happy Craft Dance.
And hey, if you don't have the time to make one or it just isn't your thing (and trust me I understand)...
I know this Etsy shop that makes beautiful ones. d

Here are ALL the materials you'll need to make the beauty above: 

- 1 -  1"x6" foot board.
- Wood Stain
- White paint (primer paint, house paint, craft paint, ect...)
- Chevron Pattern
- Self Adhesive Vinyl (for Chevron & Numbers)
- Ruler
- Sharpie (That's what we made all the inch mark lines with)
- Black craft paint

You can get all those for probably under $20.


$20 for an amazing Growth Chart Ruler... You made yourself! 

Hey... you might be so good at it you could sell them online on Etsy.
Just don't expect me to buy one unless I win the lottery.


Have a great week!


God Bless & Much Love,

    Jessica


This post is linked up at:


The DIY Dreamer