So, what does one do a week after having a baby?
Normal people are sleeping on their couches and recovering. No, weird me decided it would be an awesome idea to make my mom a birthday present.
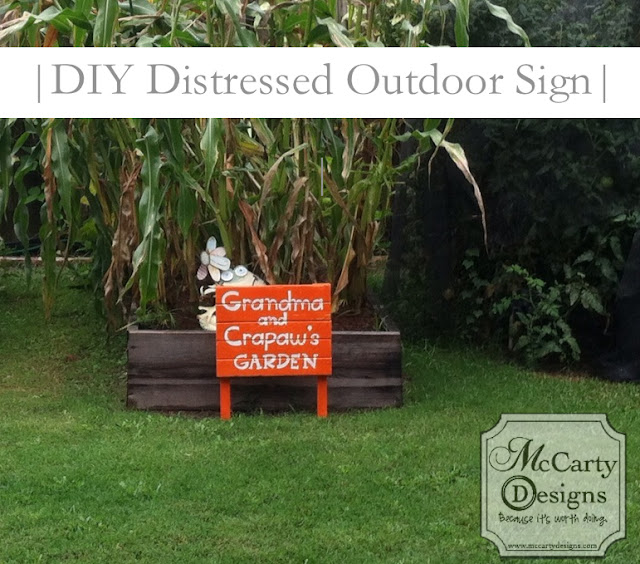
My sister had been wanting to buy her this wooden sign from Disney World (my mom's a bit of a fan) yet it was over $80. On my Pinterest I'd pinned this DIY laundry sign from Burton Avenue awhile back and thought... I could make something like my sister was thinking yet perhaps a bit more personal. Over the last two years my parents have both REALLY gotten into growing their own garden, because of that I thought they could use their own garden sign.
As with all things my husband tells me... though it looks easy it will take ten times longer than you think. I hate it when he's right but even though this project looked like 20 minutes yet ended up being an hour or two it still was worth it in the end.
The cool thing about this is the endless possibilities.
Wood signs are all the rage to decorate with and I know I have a TON of ideas/wants for signs in my new casa. So, actually making this little sign gave me hope I could tackle the bigger ones later!
First, I snuck away and went to Home Depot while Bryan was still
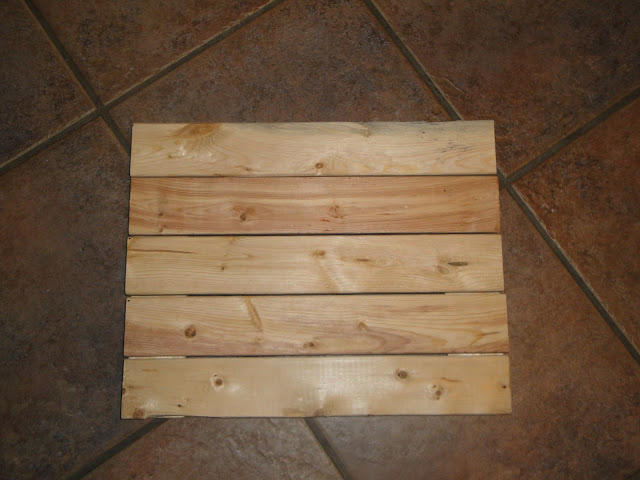
home. I had them cut the wood to the dimensions in Burton Ave's direction.
I realized quickly that the wood I choose was NOT the wood she choose so I had to fudge the dimensions a bit.
Brought home my treasure to a very stunned husband and sister than got cracking.
I believe the conversation went something like this:
Bryan: "What's that?"
Jessica: "No idea what you are talking about."
Holly: "Is that pieces of wood? What would you need that for?"
Bryan: "You didn't."
Jessica: "No idea what you are talking about."
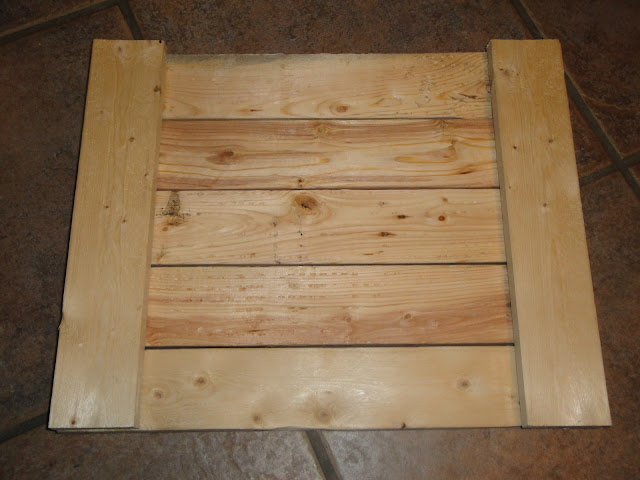
Like in Burtan's design I wanted a bit of gap between my wood slats yet a penny wasn't going to make much of a difference. I used nickles instead and used wood glue to glue the two vertical pieces down to the horizontal ones. This makes your sign!
Since my wood was different I liked the other side for the front... not the side with the two pieces of wood on the sides.
Looking back on this project I realize I guess I lucked out getting the thicker wood since this would hold up to the elements much more than Burtan's design since her's was an indoor sign. Whoo hoo!
So, here is your sign. I wanted a solid three hours (and that took A LOT of effort on my part since I don't like to wait people...) and made sure when I picked it up by the vertical pieces the others didn't fall off of it.
Assured enough to my standards the thing was solid, I took it outside and sprayed the front with some white primer spray paint. This is important as it will be the color of your lettering.
While I was waiting for the paint to dry I pulled out my amazing Cricut that I got from my mother-in-law for Christmas. I know... you can feel jealous I have the best mother-in-law in the world. Tis true... tis true.
As with anything with my Cricut... it takes forever to cut this stuff out. Yet, once I figure it out it is totally worth it. I cut out my letters in silver vinyl and laid them out on my project.
My youngest niece Lucy could never say Grandpa. She called him Crapaw. I loved it so much I won't let anyone forget she use to call him that.
With the vinyl secured onto the sign I took it back outside and spray painted the whole thing orange.
I peeled off the letters and it left me with crisp white lettering underneath! Plus it was fun for me to pull off the letters with tweezers.
My sweet hubby than took the sign and nailed some finishing nails just to secure all the wood slats together. (That's the engineer in him) He than took a sander to it and distressed it all around.
Since the sign was intended for outside use we spray painted a clear coat of protectant on it too so it will last for years. We make awesome fun things together.
We later ran back to Home Depot and got some stakes and added them on as legs.
This is what it looks like from the back.
It was all ready for my amazing mom for her Birthday.
I think she liked it. :)
Happy Birthday Mom.


I would like to thank you for the efforts you have made in writing this post. I am hoping the same best work from you in the future as well.
ReplyDeleteCustom Sign Design
Thank you Steve! Check back this week, I have a Pottery Barn sign knockoff that is similar to this. Have a great week!
ReplyDelete